
Getting into 3D printing sounds simple at first. Buy a machine, load a file, press print. In reality, there is a bit more to it, but that is not a bad thing. Once you understand how entry level machines actually behave, things start to make sense quickly.
If you are thinking about buying your first printer, it helps to know what you are really paying for, what materials you will deal with, and how much maintenance is involved.
That is what this guide focuses on, without overcomplicating anything.
What “entry level” actually means
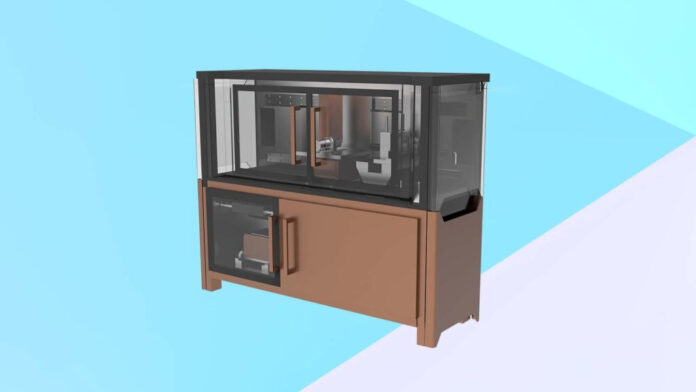
Entry level 3D printers are usually based on a method called fused filament fabrication. In simple terms, the printer melts plastic and lays it down layer by layer until the object is finished.
These machines are built for accessibility, not perfection. You will get decent results, but only after some adjustment and trial.
Early on, most people start searching for the best 3d printer for beginners, and it is easy to assume the choice alone will determine your results.
In practice, even a good machine still needs setup, calibration, and patience. The model you choose matters, but how you use it matters more.
Expect some learning in the first few weeks. That is normal.
Price breakdown and what you actually pay
The price of entry level 3D printers is more reasonable than most people expect. Still, the printer itself is only part of the cost.
Typical price range
Most beginner machines fall into a predictable range:
- Basic entry printers can start around $100
- Most reliable beginner options sit between $200 and $800
- Some better built entry models push closer to $1,000
That range usually reflects build quality, stability, and how much setup is required.
What else you pay for
After buying the printer, there are a few ongoing costs that show up quickly:
- Filament for printing, usually $20 to $30 per kilogram for PLA
- Replacement parts like nozzles, typically every few months
- Failed prints, which use extra material
Most beginners underestimate how much material is lost during failed prints or testing
Quick cost overview
| Cost type | Typical range | Notes |
| Printer | $150 to $1,000 | One time purchase |
| Filament | $20 to $30 per kg | Ongoing |
| Maintenance | $5 to $60 per part | Occasional replacement |
| Electricity | Very low | Often negligible |
Once you see it this way, the machine is just the starting point.
Materials you will actually use
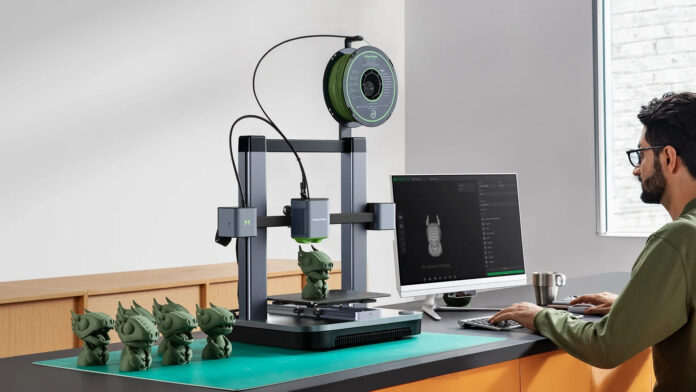
When you start printing, materials matter more than most guides suggest. Not because of technical complexity, but because each material behaves differently in real use.
The most common beginner materials
PLA is the default starting point. It prints easily, sticks well, and does not require high temperatures. It is also the cheapest option, which makes it practical for learning.
PETG is often the next step. It is stronger than PLA and more flexible, but it can be harder to dial in.
ABS is common, but beginners struggle with it. It needs higher temperatures and controlled conditions, or prints start warping.
How they compare in practice
- PLA is predictable and forgiving
- PETG is stronger but slightly harder to tune
- ABS can be unreliable without the right setup
PLA remains the most widely used beginner material mainly because of its stability and low cost, not just ease of use
You do not need to try everything at once. Start simple and build from there.
What maintenance really looks like

Maintenance is where expectations and reality often don’t match. Entry level printers are not maintenance free. They are simple machines, but they still need regular attention.
The parts that wear out first
Most problems come from a few predictable components:
- The nozzle gets clogged or worn over time
- The extruder can lose grip on filament
- The print bed needs leveling regularly
These are not major repairs. They are routine tasks.
How often you deal with it
A typical beginner schedule looks like this:
- Bed leveling before important prints
- Nozzle cleaning every few weeks
- Nozzle replacement every 3 to 6 months
The key is consistency. Ignoring small issues usually leads to bigger problems later.
Common beginner issues and how to handle them
Almost everyone runs into the same problems early on. The difference is how quickly you learn to fix them.
First layer problems
If the first layer does not stick, the print will fail. This usually comes from incorrect bed leveling or temperature settings.
Filament jams
Clogs happen when the filament does not melt or move correctly. Cleaning the nozzle or adjusting temperature usually fixes it.
Print shifting
If the object moves during printing, it often means the bed is not stable or the speed is too high.
Important note: Most issues are not caused by the printer itself, but by setup and calibration. Once you understand that, troubleshooting becomes easier.
A realistic look at time and effort

3D printing is not instant. Even simple objects can take hours to print, and the first few attempts often fail.
That can feel frustrating at first, but it is part of the process. Over time, you start recognizing patterns. You know when something is off just by looking at the first few layers.
A single successful print feels more predictable once you have done it a few times. That is when the machine becomes useful, not just interesting.
Final thoughts
Entry level 3D printing machines are accessible, but they are not plug and play devices. The price is manageable, materials are affordable, and maintenance is straightforward once you accept it as part of the process.
If you go in expecting perfection, you will be disappointed. If you expect to learn how the machine works and adjust along the way, the experience makes sense.
Start with a basic setup. Use PLA. Take your time with calibration. That approach saves more money and frustration than chasing the “perfect” printer at the beginning.


")
